
Client - Server 통신하기
크롬 브라우저가 Client 라고 보면, 클라이언트를 이용해서 회원가입을 하기 위해 아이디를 입력하고 비밀번호를 입력하여 서버에 보낸다.
우리는 클라이언트가 보내주는 자료를 Body-Parcer라는 dependency 를 이용하여 정보를 받을 수 있다.
BodyParser 설치 🧚🏻♀️
> npm install body-parser --save
Post Man 설치 🧚🏻♀️
Download Postman | Try Postman for Free
Try Postman for free! Join 13 million developers who rely on Postman, the collaboration platform for API development. Create better APIs—faster.
www.postman.com
Register Route 만들기
회원가입을 위한 route를 만들어보자.
index.js 페이지에서 다음과 같은 코드를 추가해준다.
const bodyParser = require('body-parser');
const { User } = require("./model/User");
npm 'body-parser'과 MongoDB Model & Schema 를 만든 User를 이용한다는 코드이다.
// application/x-www-form-urlencoded  와 json 형태를 가져와
// 이렇게 되어있는 데이터를 분석해서 가져 올 수 있도록 도와주는 것
app.use(bodyParser.urlencoded({extend:true}));;
app.use(bodyParser.json());
client가 입력하는 데이터를 가져올때 application/x-www-form-urlencoded 와 json 형태를 가져와
데이터를 분석해서 가져 올 수 있도록 도와주는 코드도 추가해준다.
app.post('/register', (req, res) => {

    // 회원 가입 할때 필요한 정보들을 client에서 가져오면
    // 그것들을 데이터 베이스에 넣어준다.

    const user = new User(req.body);

    user.save((err, userInfo) => {
        if(err) return res.json({success: false, err});
        return res.status(200).json({
            success: true
        })
    })

});
Post 방식을 이용하여 회원가입시 UserInfo의 데이터를 저장한다는 코드이다.
에러가 발생하면 sucess: false 와 함께 에러코드가 나타나고
성공시에는 200과 함께 success: true 가 떨어진다.
진짜, 회원 가입 해보자 🎶
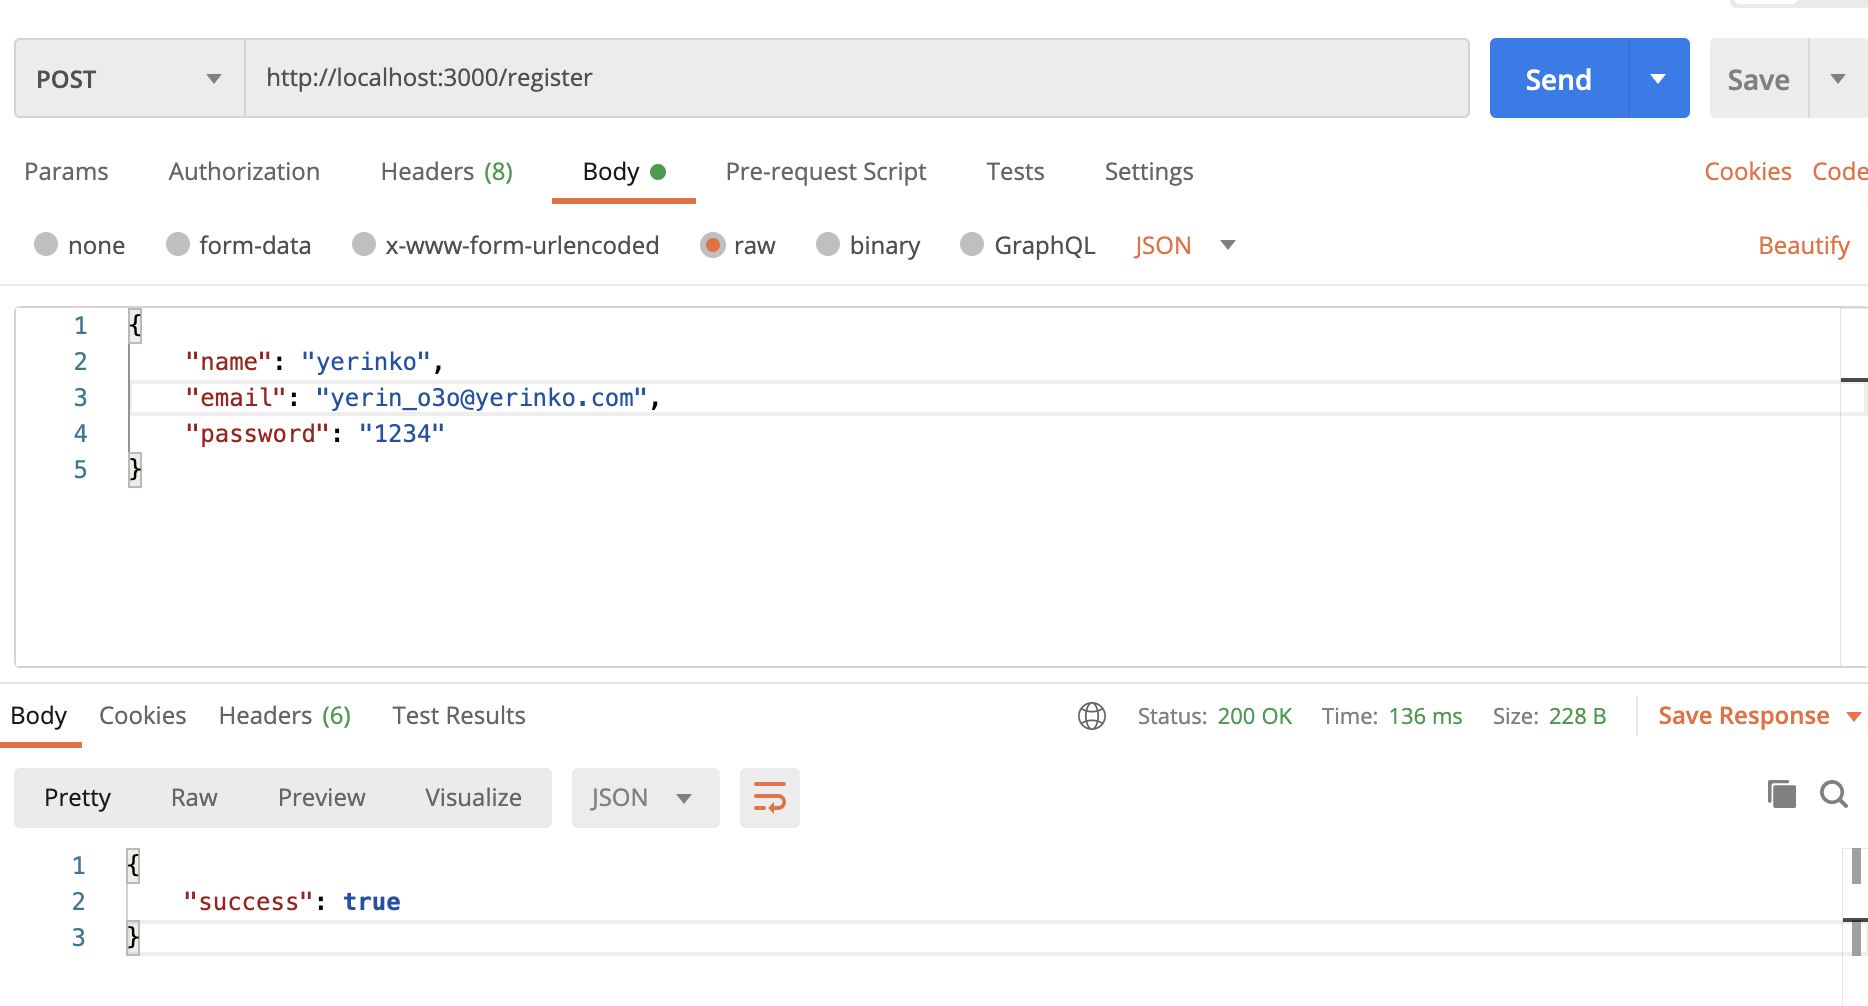
PostMan 을 이용하여 회원가입시 필요한 데이터를 넣어 가입을 시도해준다.
POST > http://localhost:3000/register
{
    "name": "yerinko",
    "email": "yerinko@yerinko.com,
    "password": "1234"
}
> " success": true 가 나타나며 성공한것을 알려준다.
'Front-end > Node.js' 카테고리의 다른 글
| #6. 환경 변수 process.env.NODE_ENV 설정하기 (0) | 2020.11.25 |
|---|---|
| #5. Nodemon 설치 (0) | 2020.11.24 |
| #3. MongoDB Model & Schema 만들기 (0) | 2020.11.17 |
| #2. MongoDB 연결하기 (0) | 2020.11.16 |
| #1. Node.js 와 Express.js (0) | 2020.11.16 |


